This tutorial assumes you have already configured Rate Calculator and downloaded the Rate Calculator zip file. If you have not, please see Download the Rate Calculator plugin. Also, please ensure your Website meets the minimum requirements.
If you have access to a developer, Web designer, or a WordPress expert, we recommend letting them install Rate Calculator. Alternatively, if you would like for us to install the plugin for you, we offer Professional Installation.
Installation
There are several ways to install a WordPress plugin, the easiest is to upload the zip file directly to your Website. First, make sure you are logged in. The most common way is to visit https://example.com/wp-admin where example.com is your Website address. You will be asked to enter your username ( or email ) and password.
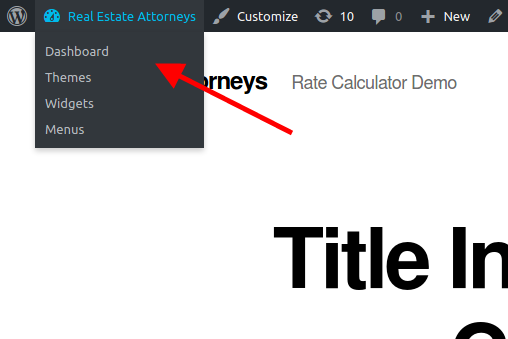
When you first log in, you should be at the WordPress Dashboard. If you are not on the Dashboard or another administration page, please go there. If you happen to be on the "front end", you can use the navigation in the top left to access the Dashboard.

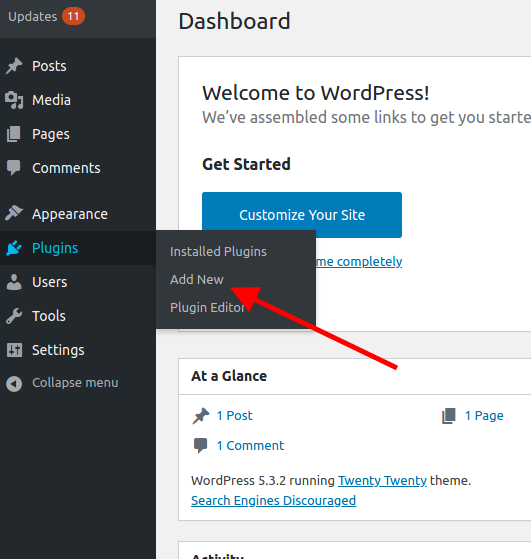
Once on the Dashboard, find the Plugins menu item on the main navigation. On larger devices, this will be on the left side of the screen. On small screens, you may need to open the menu. Expand the Plugins menu either by hovering over or tapping on Plugins. Find Add New and click.

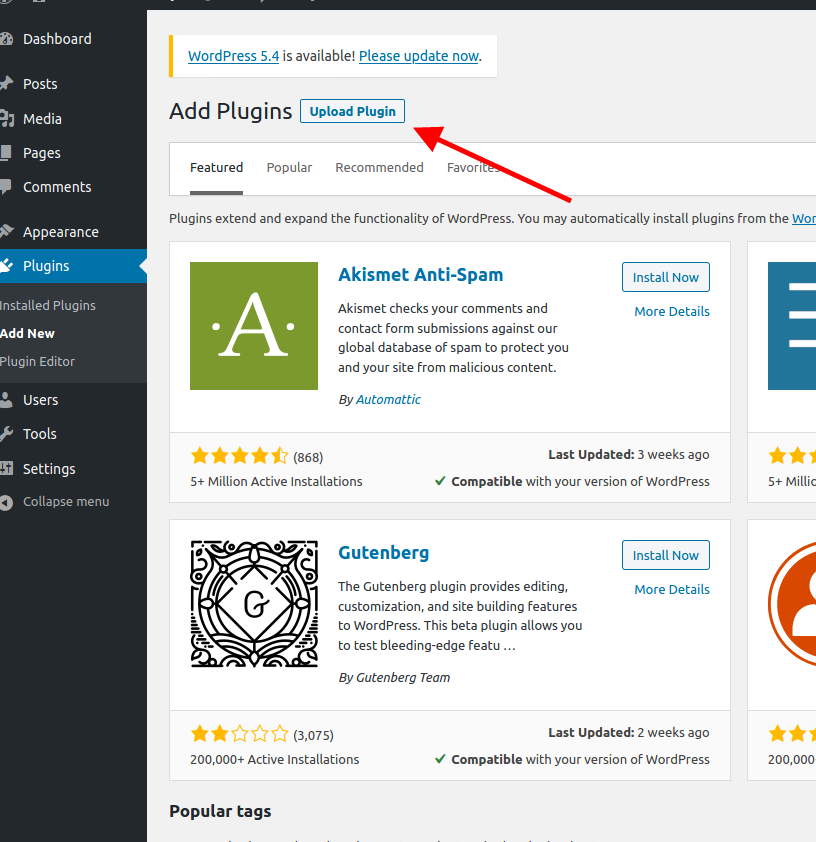
Near the top of this page, next to the title, Add Plugins, find the button labeled "Upload Plugin". Click Upload Plugin.

This will expose the upload form. Click "Browse" and navigate to the location on your device to where you downloaded the plugin zip file. Select the file and click "Install Now".
If everything worked correctly, you should receive a message that the plugin was installed successfully.
Next Steps:
Please see "Configure Rate Calculator".